Boot Process of the GCW0, RG350 and similar devices
Introduction
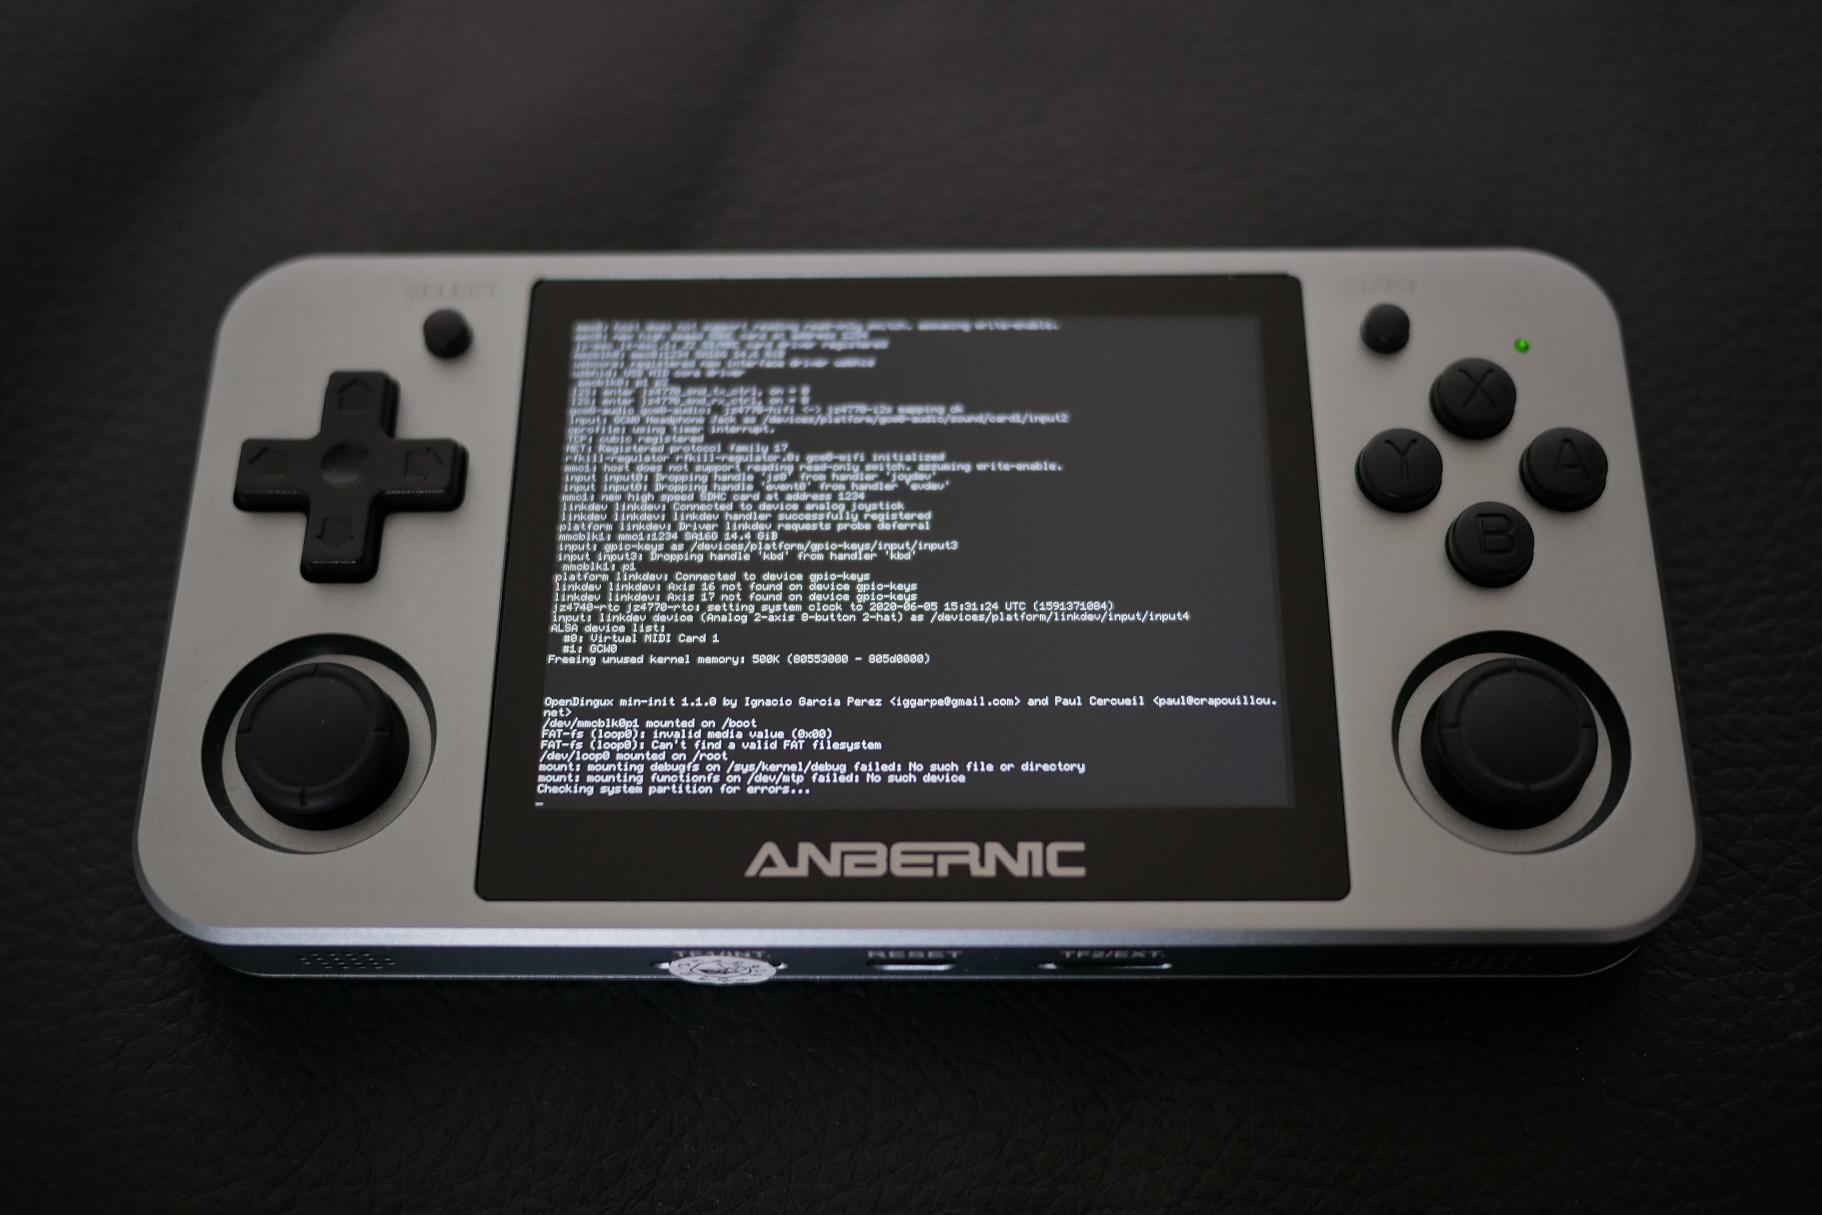
The GCW0 as well as the RG350 are small handheld retro emulation and homebrew devices running the OpenDingux operating system. Although the RG350 was released 6 years after the GCW0, they both use the exact same Ingenic JZ4770 SoC. This post focuses on how the RG350's system image is structured, how the JZ4770 loads data from it and how it ultimately jumps to the OpenDingux Linux kernel.
System Image Layout
The layout of the system image looks as follows:
| MBR |
| First Stage Bootloader |
| System image (containing the Kernel) |
| Data image (containing the rootfs) |
Initial loading
When the JZ4770 is powered up, it first start executing it's Boot ROM. The Boot ROM reads the boot select pins and determines on the RG350 that it's supposed to boot from an MMC device, here an SD card.
The Boot ROM proceedes by copying the first 0x2000 bytes on the SD card into the SoCs dcache and deinitializing the MMC interface again. To validate if the read data is correct, the Boot ROM skips past the MBR, right to the first stage bootloader, and checks for the magic value MSPL. If valid, the 0x2000 bytes previously loaded into dcache are copied into icache where the Boot ROM jumps into. This is possible due to the unique fact that the JZ4770s cache is mapped into the address space at address 0x8000'0000.
MBR and bootstrapper
The data found in the icache now is the MBR immediately followed by the first stage bootloader and the Program Counter now points to address 0x8000'0000. This is the start of the MBR which looks as follows in memory.
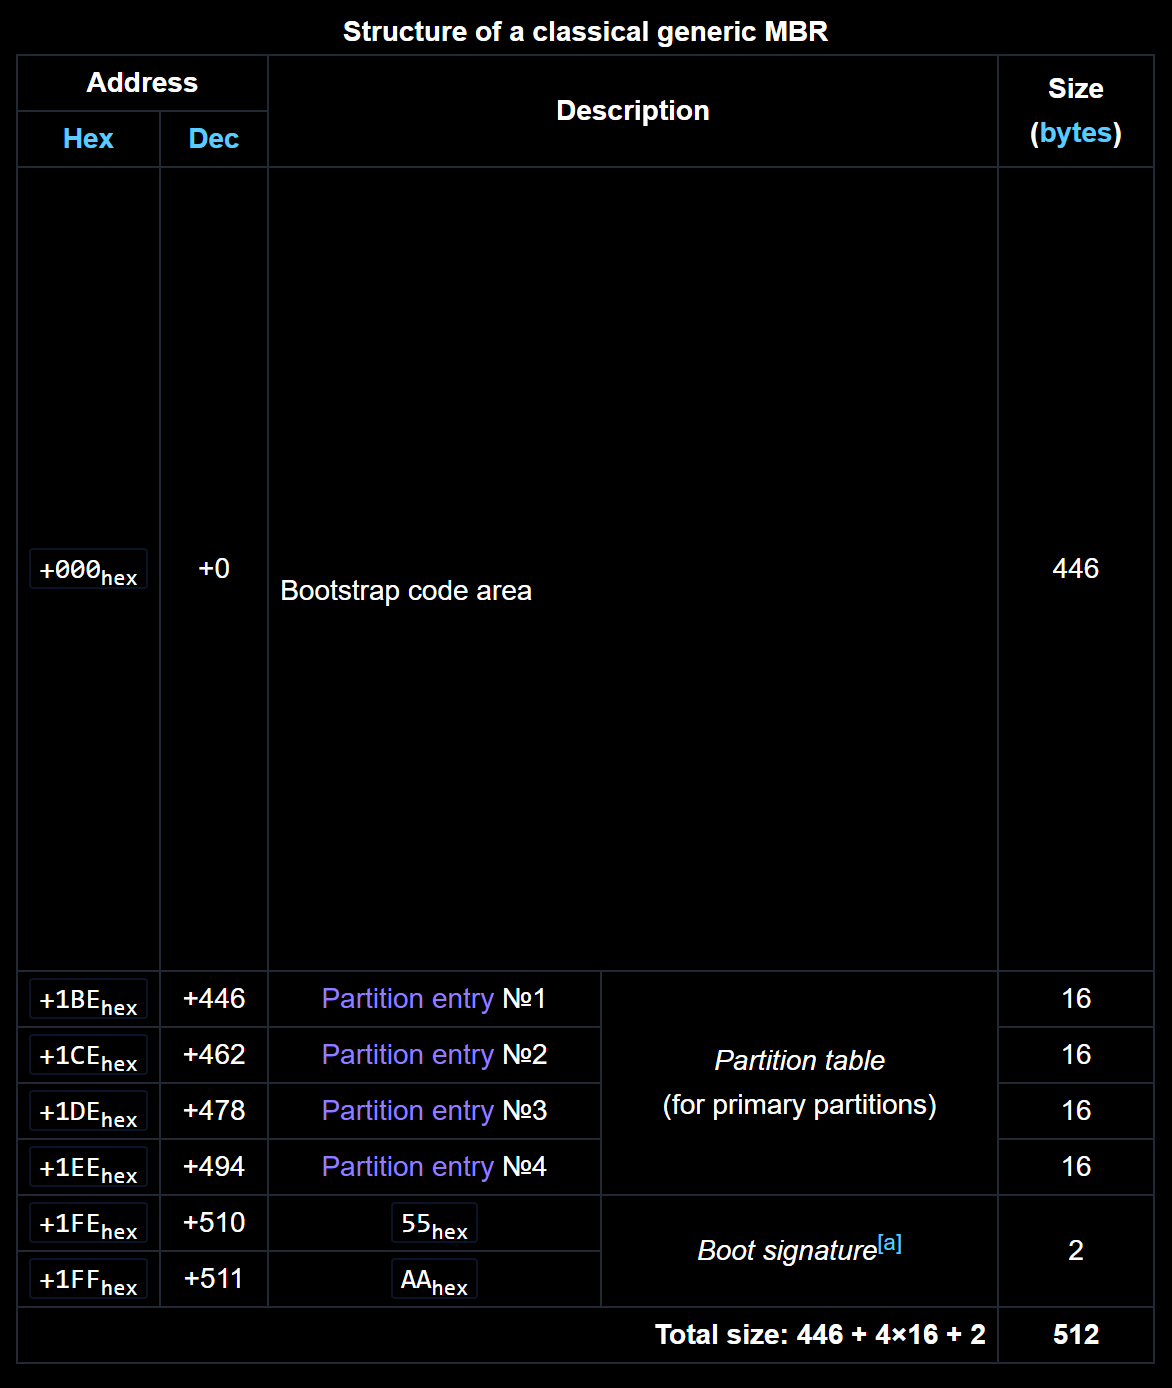
The MBR starts with the so called bootstrap code. A 440 bytes section containing code to setup the environment and jump into the actual first stage bootloader. On the GCW0 and the RG350, this is one instruction: 80 00 00 10 which is the MIPS instruction B PC+#0x204 which jumps past the MBR (0x200 bytes) and the MSPL magic (4 bytes). Congratulations, we're now in our bootloader!
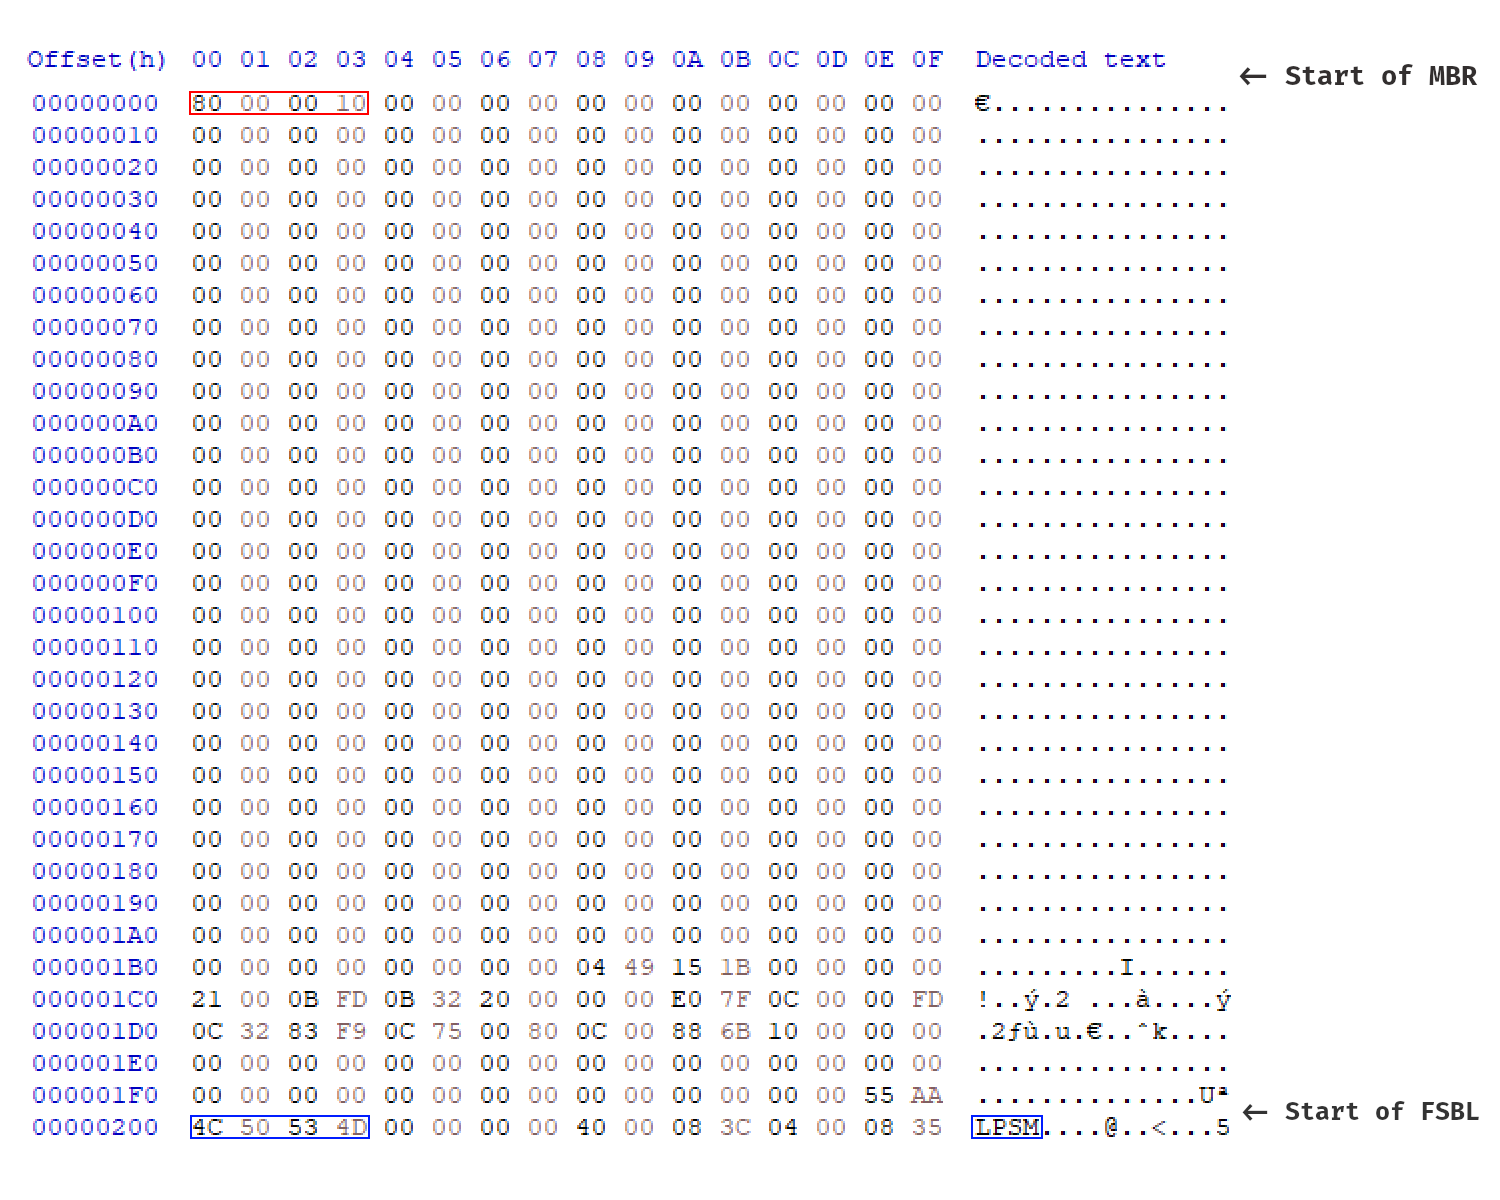 In red, the branch instruction is shown, in blue the
 MSPL magic in little endian.
Bootloader startup code
The first thing the bootloader does is disabling all interrupts and clearing their flags. This is important since in the current state, interrupts cannot be handled and would cause the processor to jump to invalid addresses. They will be later on reenabled in the linux kernel. Next the stack is setup by initializing the stack pointer to point to a free area in memory. This is necessary to properly support C function calls and variables and the next step: the jump to main().
Bootloader
Execution now has reached the actual loader code of the bootloader. First, the MBR, which still can be found at address 0x8000'0000 in the memory mapped dcache, is parsed in order to find the offsets and sizes of the linux kernel and rootfs partitions. The MMC interface is then once again initialized and reads the linux kernel from the SD card into KSEG1. This is a 512MB region in memory which does not allow for caching. This is very important as the currently executed code still lives inside dcache and icache. This means any read or write to a region that supports caching would trash the cache causing the bootloader to be overwritten with garbage data and so corrupting the boot environment.
Once the linux kernel is loaded into memory, the linux configuration struct is setup so Linux later on for example knows where to load the rootfs from. After this, the bootloader is done and can jump to the address the kernel was loaded at via a function call that passes in the kernel parameter config struct.
The rest of the boot process is now the same as on any other linux system and is described very thoroughly here.
Thanks to
- pcercuei for answering many of my questions about the system
- circuits for answering many more of my questions and providing a pretty title image for this post
- All the nice people on the Retro Gaming Handhelds Discord for being awesome to talk to